DIY Pantry Door
Nov 5
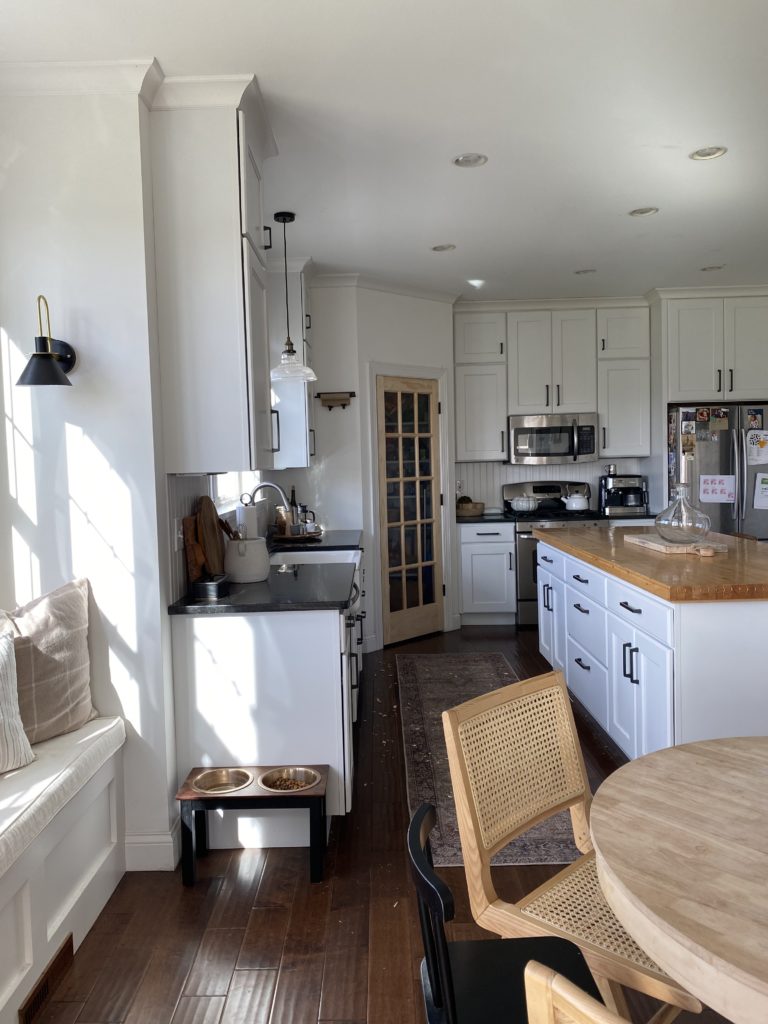
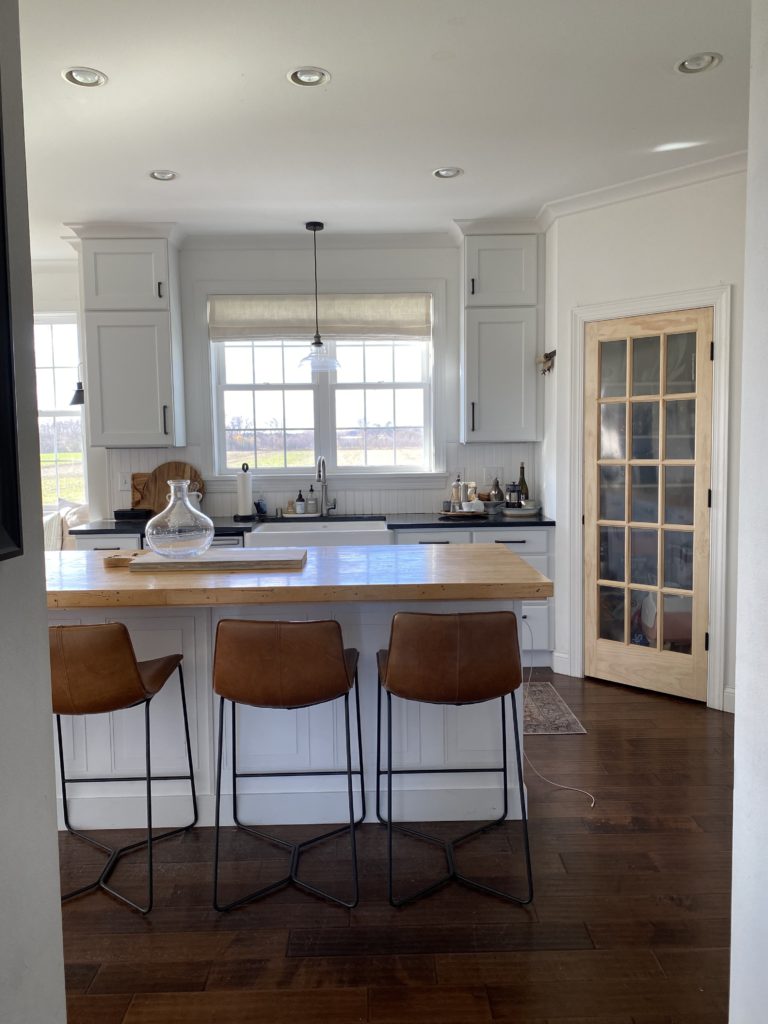
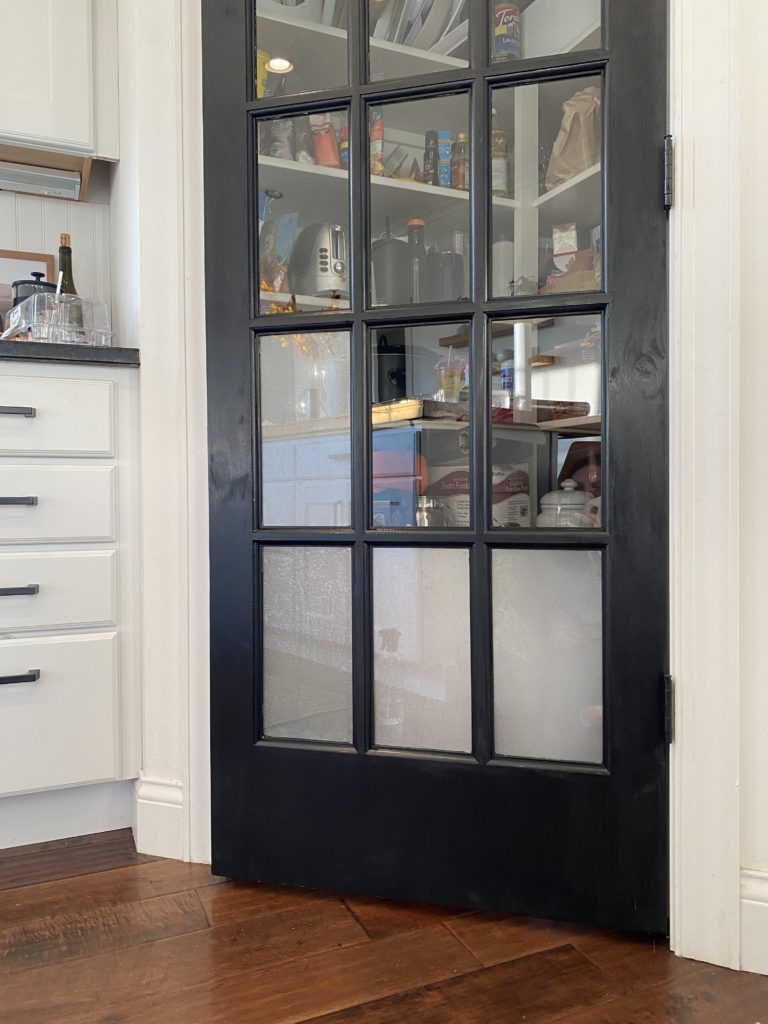
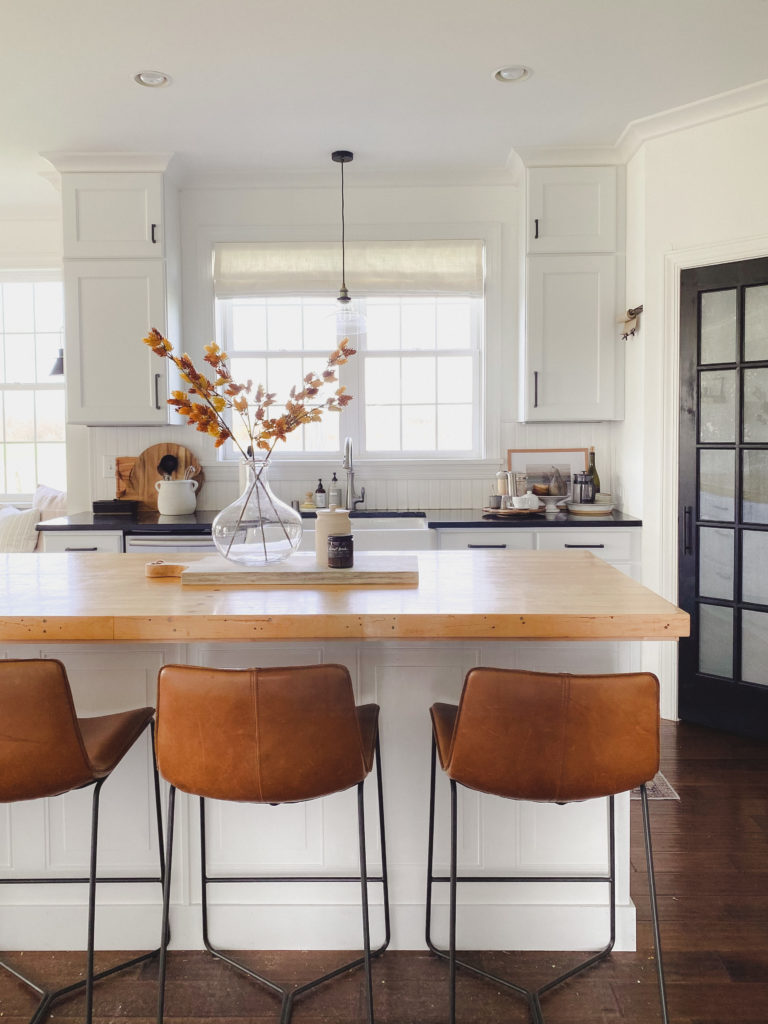
As we continue to make updates to the house in year 10, I wanted to breathe some life into the kitchen. As in all of our recent projects, trying to keep it somewhat simple and inexpensive but have a high impact was the name of the game. I was drawn to the idea of switching out the pantry door to a black glass panel door. Giving a touch of modernity and a tie back to our new black sconces that now frame our window seat bench. It felt like this change would really pull the new look of the main floor together. I quickly fell in love with some fun pendant lights from Rejuvenation in their sale section, and after only receiving one of two pendants in the mail, finding out there is no other matching one in stock, returning said pendants and ordering a new version (I wasn’t as in love with) –it actually all worked out in the end and we love the look of our linen and black accent pendants from Rejuvenation. Shout out to Michael in customer service who is super grateful to be done with me:)
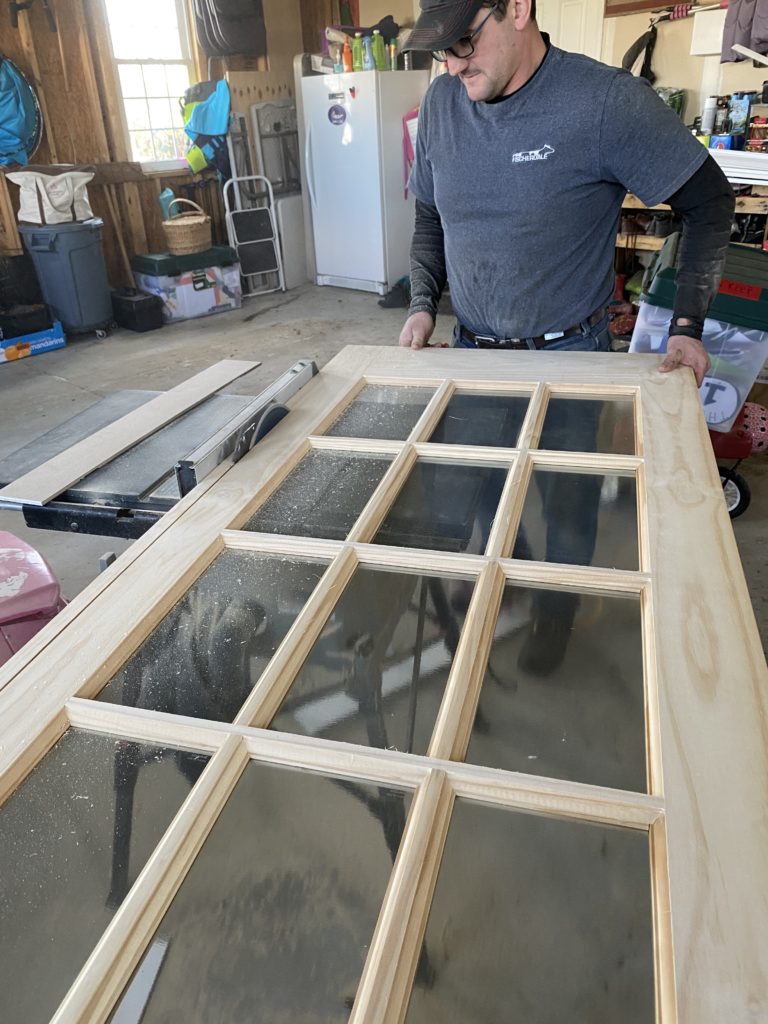
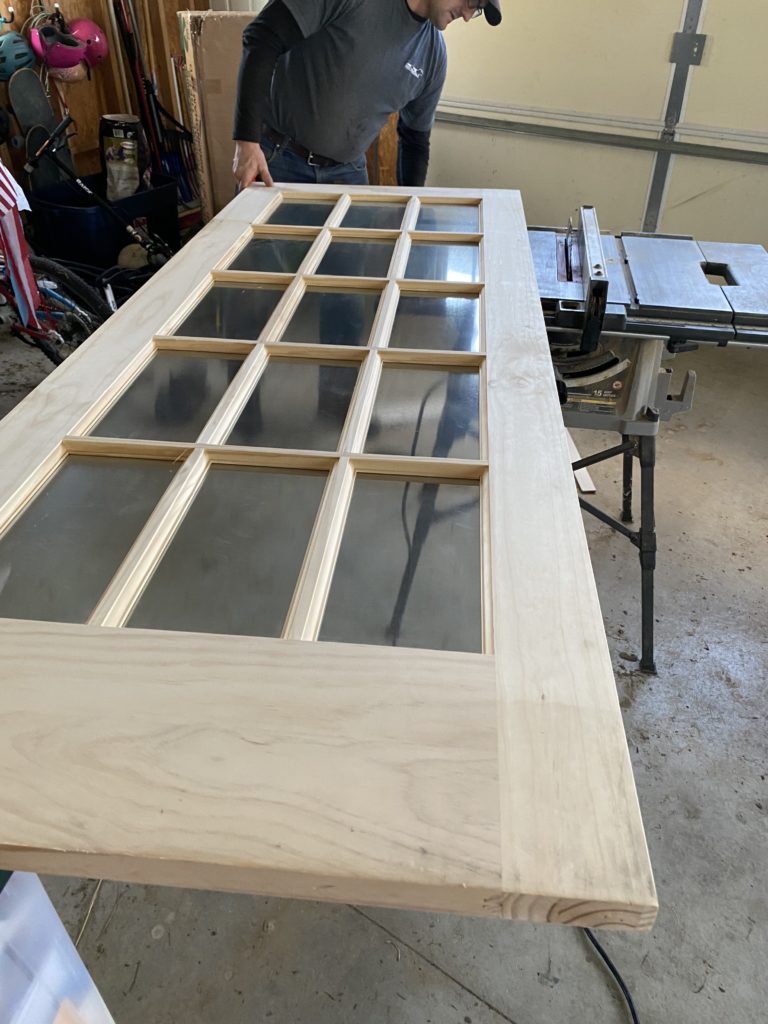
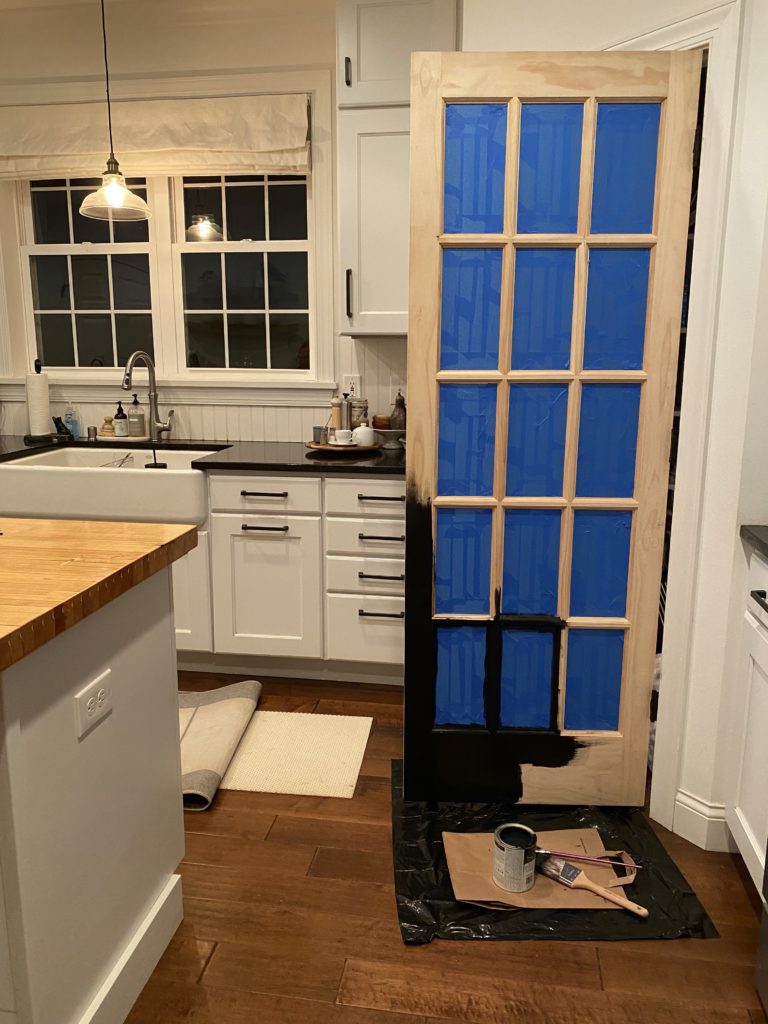
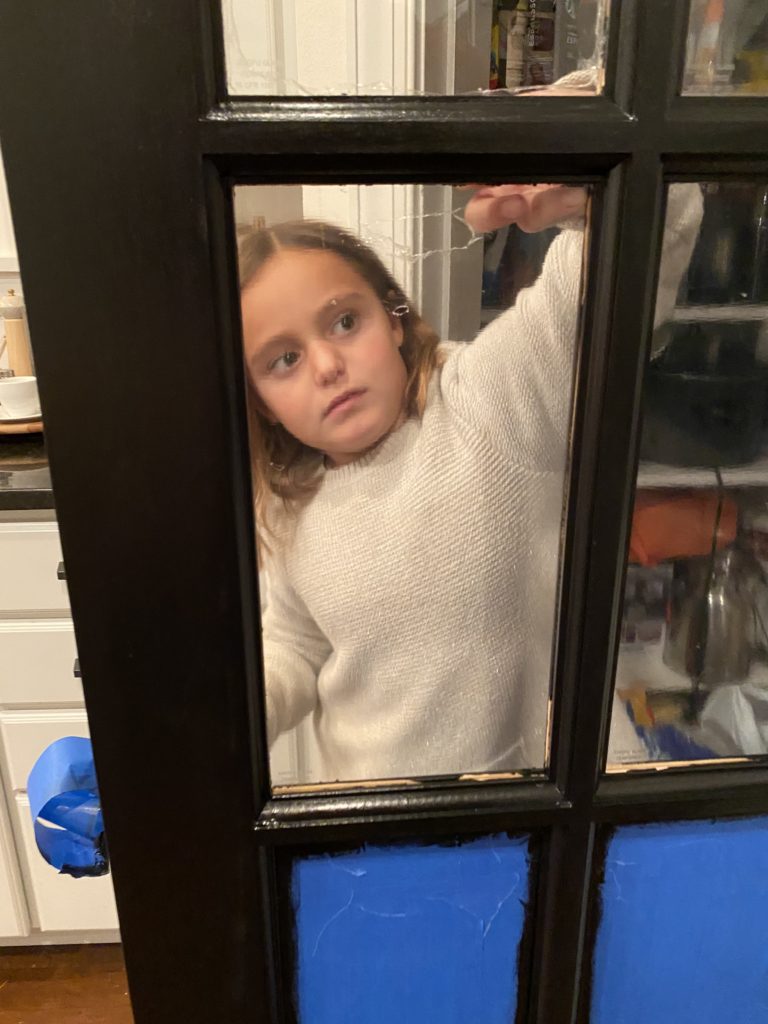
You can see my inspiration board I made below and sent to Joe to showing him my idea and direction I was going with this (the mood board had the first set of lights that actually never came in it). After searching online for an affordable option for a black painted glass panel door, it was safe to say all options would break my budget OR the quality of wood in the affordable ones didn’t look very good. So when at HomeDepot for a completely unrelated item, I decided to go take a peak at the clearance slab doors and sure enough came across what we actually needed. An unfinished door slab with glass panels that was not the exact size I needed but I asked Joe if we could trim it down and he thought yes! 🙂 So we trimmed off an inch on each side of the door so it would be 28×80″, painted it Tricorn Black from Sherwin-Williams (it definitely took two solid coats to soak into the pine wood) and we were back in business! The taping of the glass panels on each side of the door was time consuming to say the least, definitely made me question if buying the higher priced finished door would have made more sense, but making memories I guess! 🙂 Reagan had her hand win again at helping, and all the girls wanted to take the satisfying job of pulling the painters tape off.
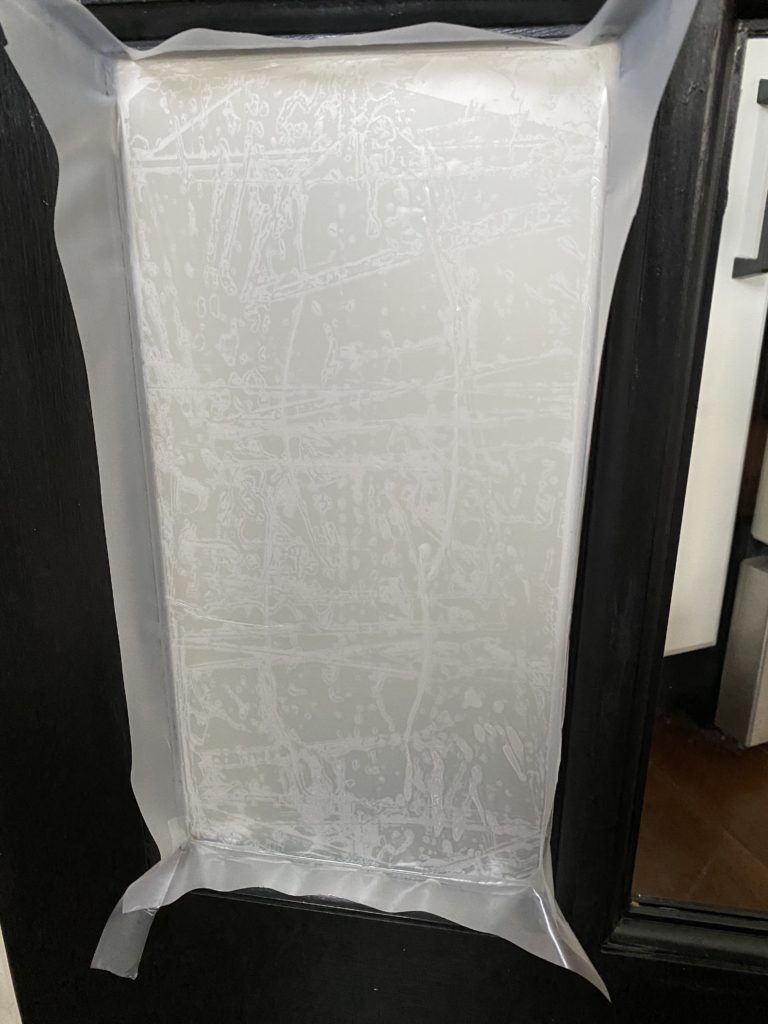
It quickly became obvious we would need to frost the panels as our dog food and pantry items were blazing through and not in neat and tidy baskets. This is where things got dicey. The privacy adhesive we bought for window treatments and a frosted look was NOT great. It was meant for exterior windows and thus must have been heavier duty but we tried our first panel and quickly realized that no matter how much attention and care we gave to laying it correctly, it had weird cracks and bubbles and just looked awful. We knew enough to not keep going;) And ended up using removable frosted window cling meant for cricut machines. This would allow us to remove them if we ever wanted to. They went on a lot smoother and gave us the opaqueness we needed. The new lights finally came and went up, and we loved the way it all pulled together!


leave one here!
comments